This chapter contains a series of quick-start tutorial designed to teach the basics of FWsim quickly. You can read these tutorials here or watch them in this Youtube Playlist: FWsim Fireworks Simulator Tutorial Series
In this tutorial series you’ll learn how to create your first show in FWsim - step by step.
Let’s take a closer look on the interface of FWsim. In the middle of our screen we will see the simulation of our fireworks show. Furthermore, we can adjust our firing positions. At the bottom of our screen we see the timeline. Here, we organize our fireworks to shoot at the right time. At the right-hand site we can configure our shots, create firing positions and more. Below that, we can select which elements to insert - for example, one shot or several shots of a firework.
Let’s start to design our first show. I want to have some music which underlines my show. So, I just pick some music of my choice in Windows Explorer, hold my mouse button and drag it to the FWsim timeline.
Now I’m ready to add some fireworks. Let’s insert some fireworks that explode in the sky – I’ll choose “Single Shot” and select a fireworks effect from the library. To see the simulation on my screen, I have to insert them into the timeline via left click. I can adjust the angle by holding the right mouse button and moving the mouse to the left or right.

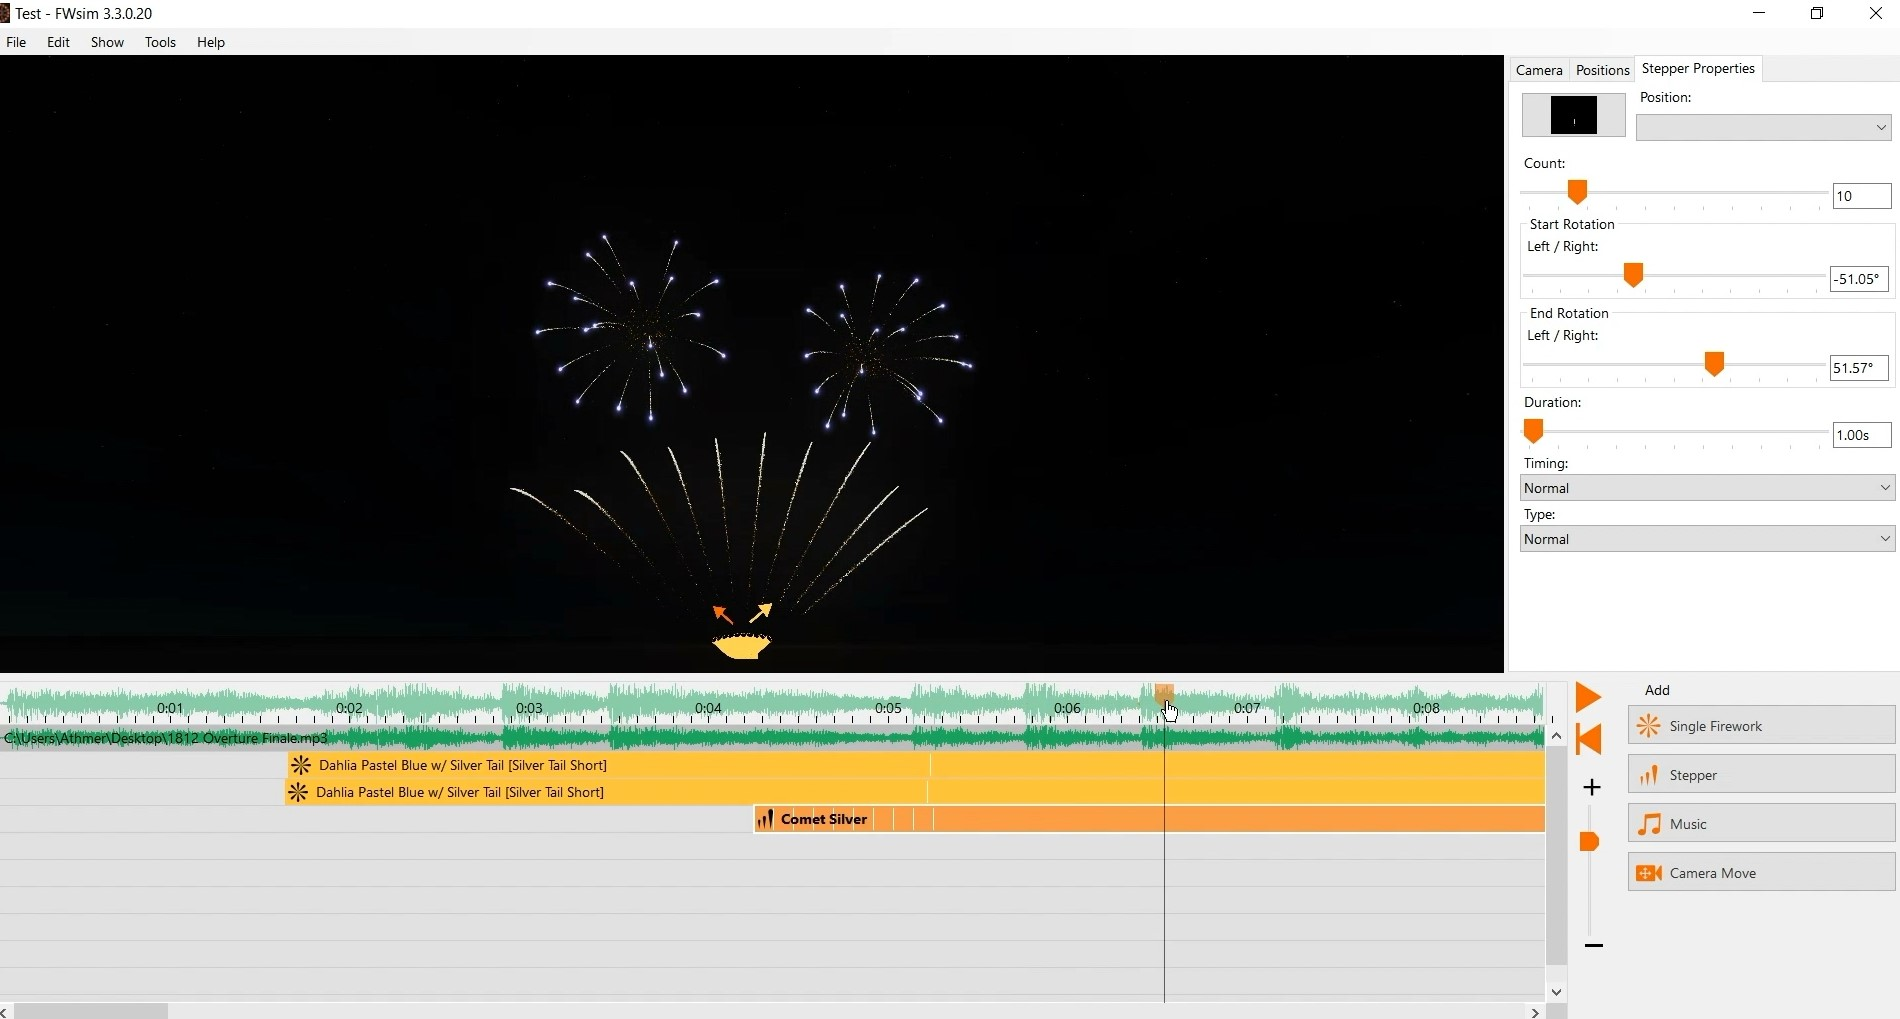
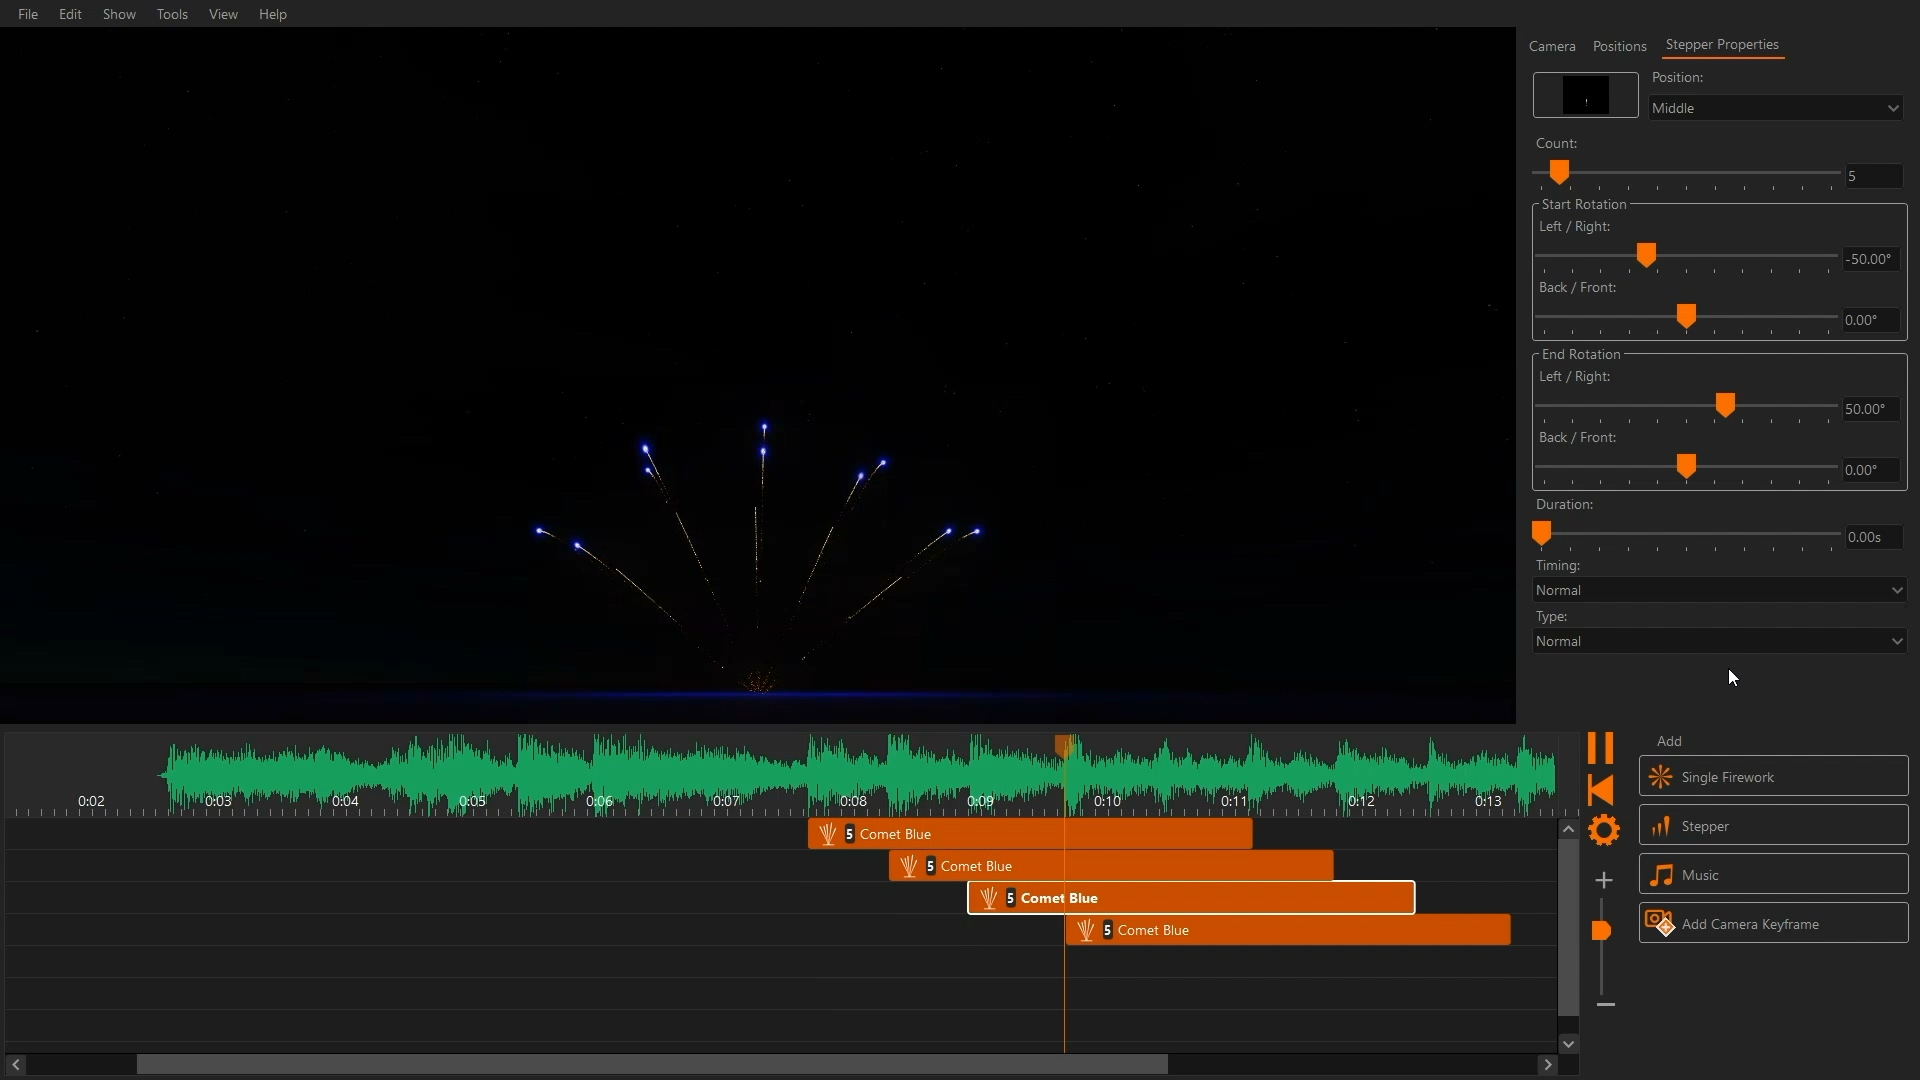
To fill the space under my shells I want some Comets. Comets simply shoot from the ground up. We want several shots in a row, so we click “Stepper”. I insert the stepper into the timeline by clicking. On the right, we can adjust the number of shots. Again, we use the right mouse button to change the two angles.
To quickly build a large show, you can copy and paste what you already have. Simply right-click on a shot in the timeline and select “Copy”. Then you right click on empty space in the timeline and choose “Paste”. You can also drag a rectangle to select multiple cues, then copy and paste them all together. You can use the keyboard shortcuts CTRL+C (copy), CTRL+X (cut) and CTRL+V (paste) to work faster.
After you’ve created your show, you can press space or the play button on the right to play.
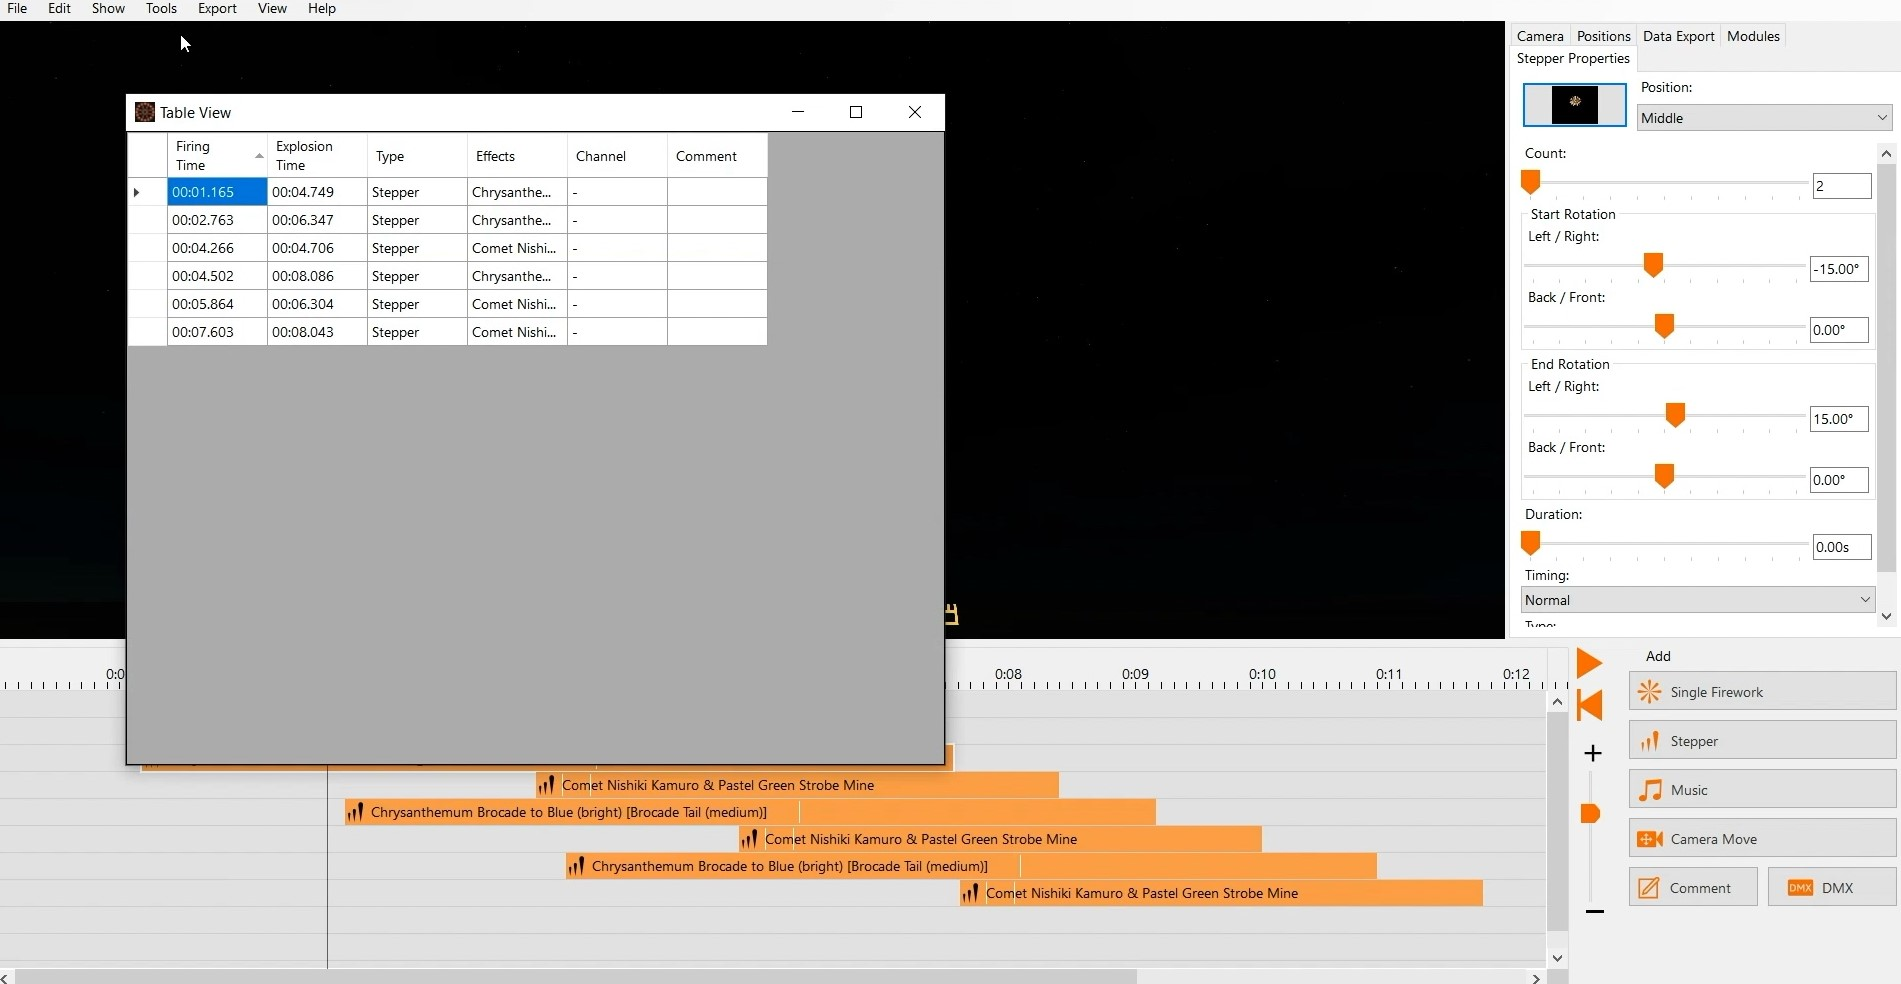
In this tutorial you’ll learn how to set up firing positions. Furthermore, we talk about the different options for steppers.
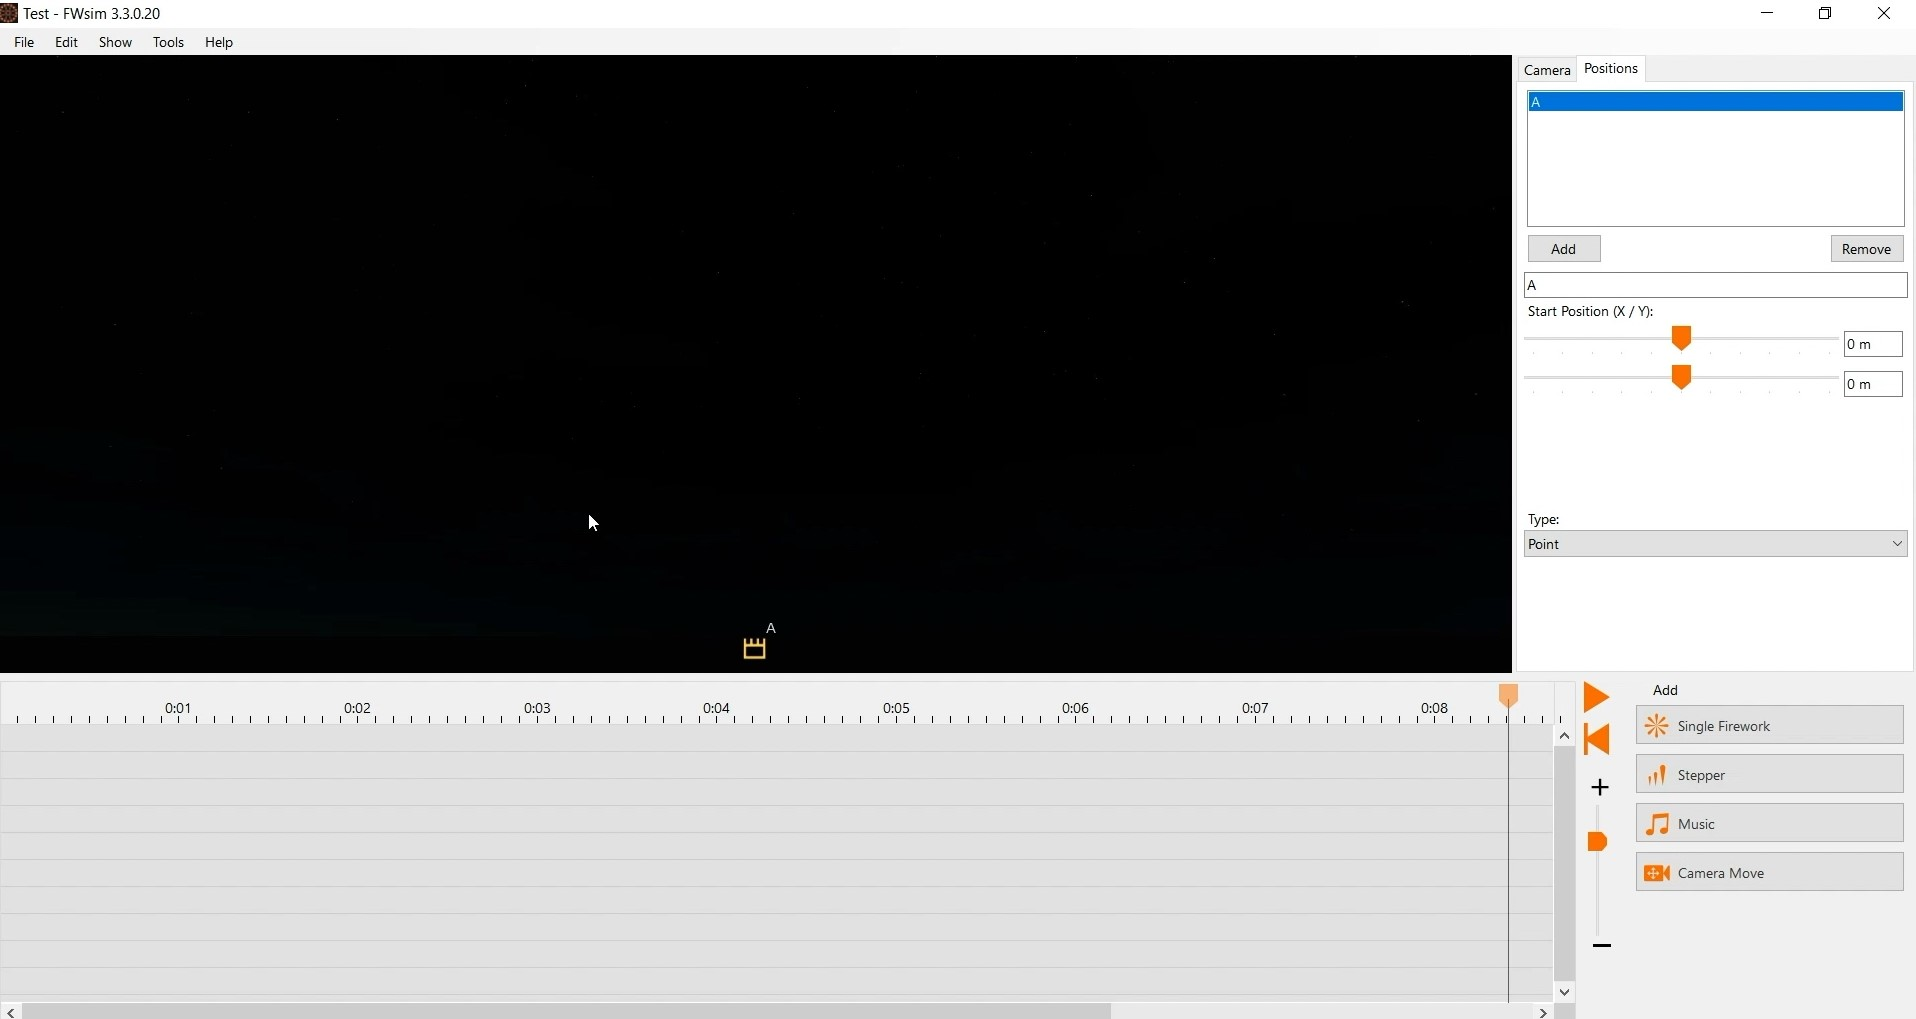
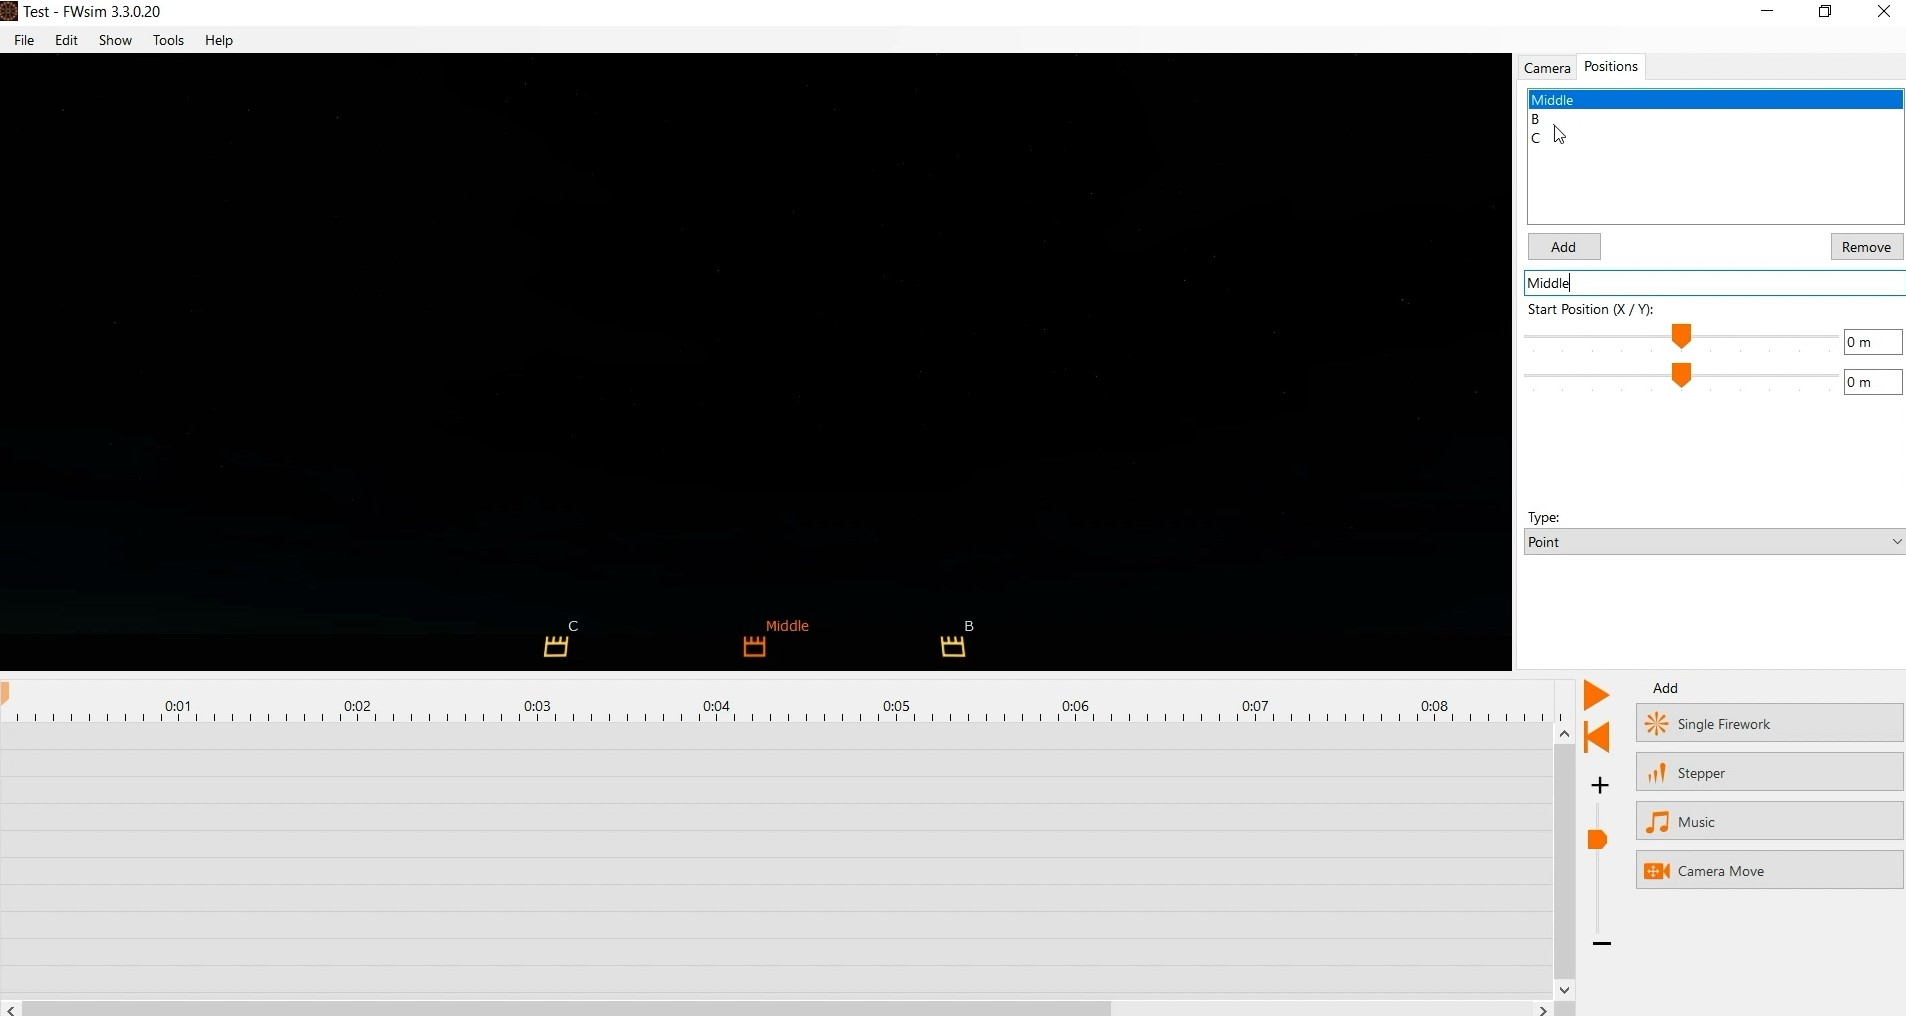
In the last video you’ve learned how to create a small fireworks show with FWsim. When you create a new show, you will see either a line or a single firing position - depending on which edition of FWsim you use. We now want to add more positions. To do that, we go to positions and click on “Add”. To move this position we have two options. The easiest way is to click the position in the 3D view, hold your mouse button and move it around. The more accurate and professional way is to enter coordinates in the sidebar. I’ll add another firing positions, place them with 100m distance between them and give them names. Good and clear names are important if you work with a lot of positions.
Let’s add some fireworks. We start with some steppers. So we choose our desired effect and activate the option “Insert several like that” to be able to add multiple copies. Now the steppers are all placed on the same position. To change that, we have two options: We can select a different position from the list on the right. Alternatively, we can drag the two arrows around in the 3D view.
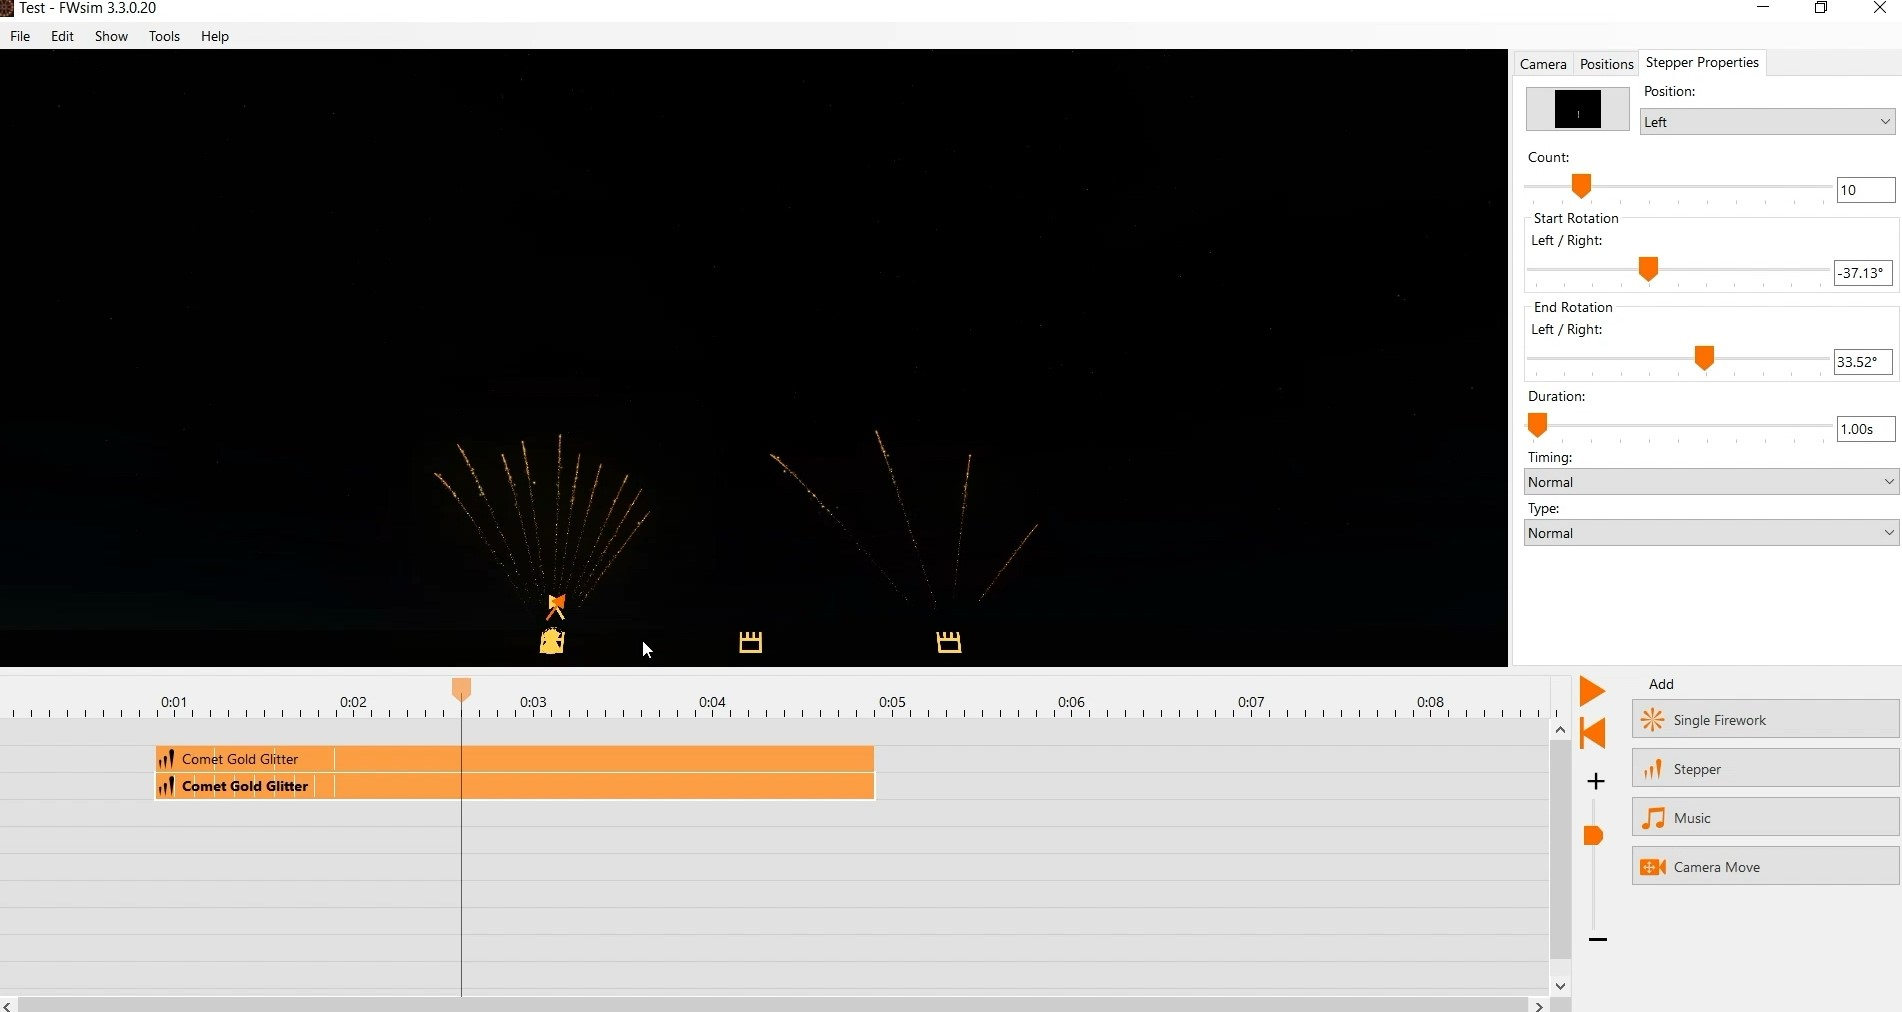
In the sidebar, we have a bunch of options for our steppers. First, you can change the number of shots. You can change the angles by typing in numbers - or simply use the right mouse button in the 3D view. Next, we want to change the stepper duration. There are two options to change this. The simple way is to hold your left mouse button at the end of the desired stepper on the timeline and move your mouse. If you need an exact duration, you can simply type that into the box. Finally, we can configure how the shots are arranged. If you want your stepper to speed up or slow down, you can use the option timing. If you want your stepper to shoot in a different way - for example starting from the middle - you can change that under “Type”. If you want to reverse a stepper or flip its angle, you can use the options in the Edit menu.
You can repeat these steps to fill your show as desired.
We will go over some useful keyboard shortcuts, advanced show editor features and give you some tips how to rapidly design big shows.
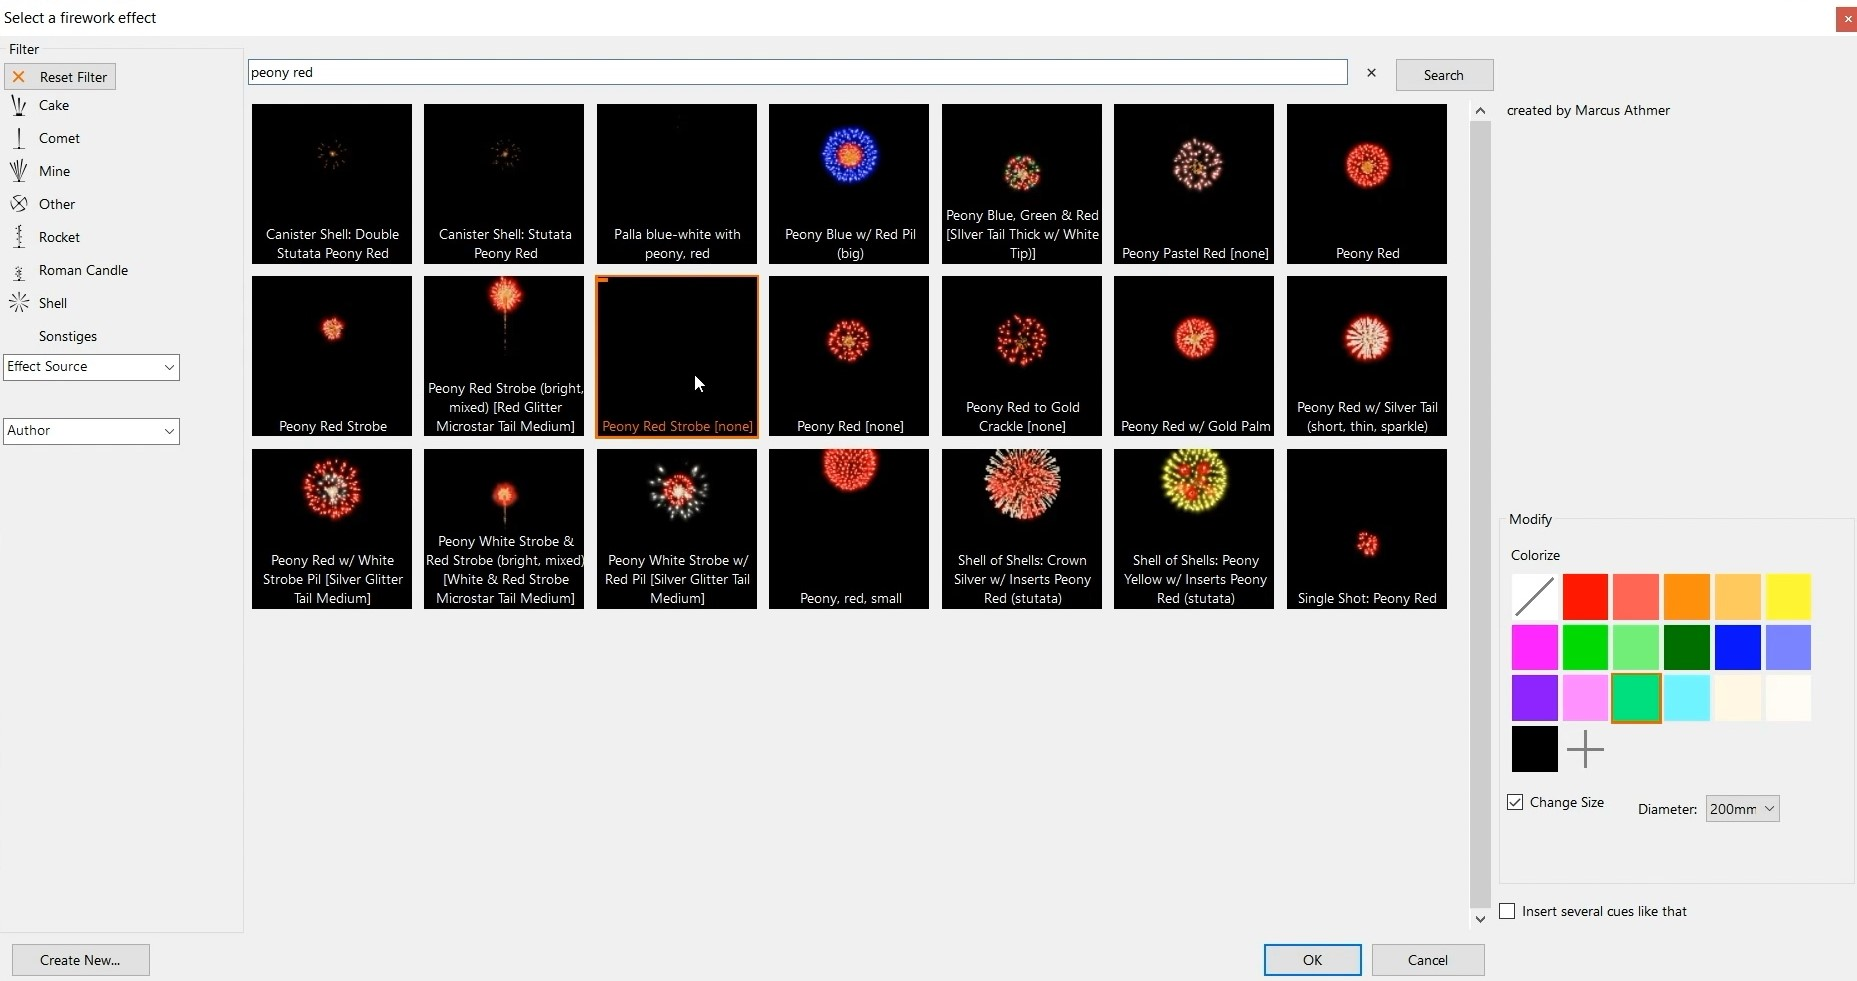
You’ve already worked with the effect library before. Now I want to show you some cool features that you may not have seen yet. First of all we click “single firework” to open the effect library window. On the right, you can change the color or the size of your desired firework. This does not change the original effect file, rather, it modifies the color on-the-fly. On the left you’ll find the filter options for the library. This is very helpful if you want to search for a specific effect. You can filter by type of firework effect. In the box below, you can choose to see only your own effects, FWsim standard effects, or downloaded effects created by other users. Below that, you can filter by the author of the effect file. If you are a fireworks professional working with FWsim Pro, then you will see several additional filters here - including color and caliber.
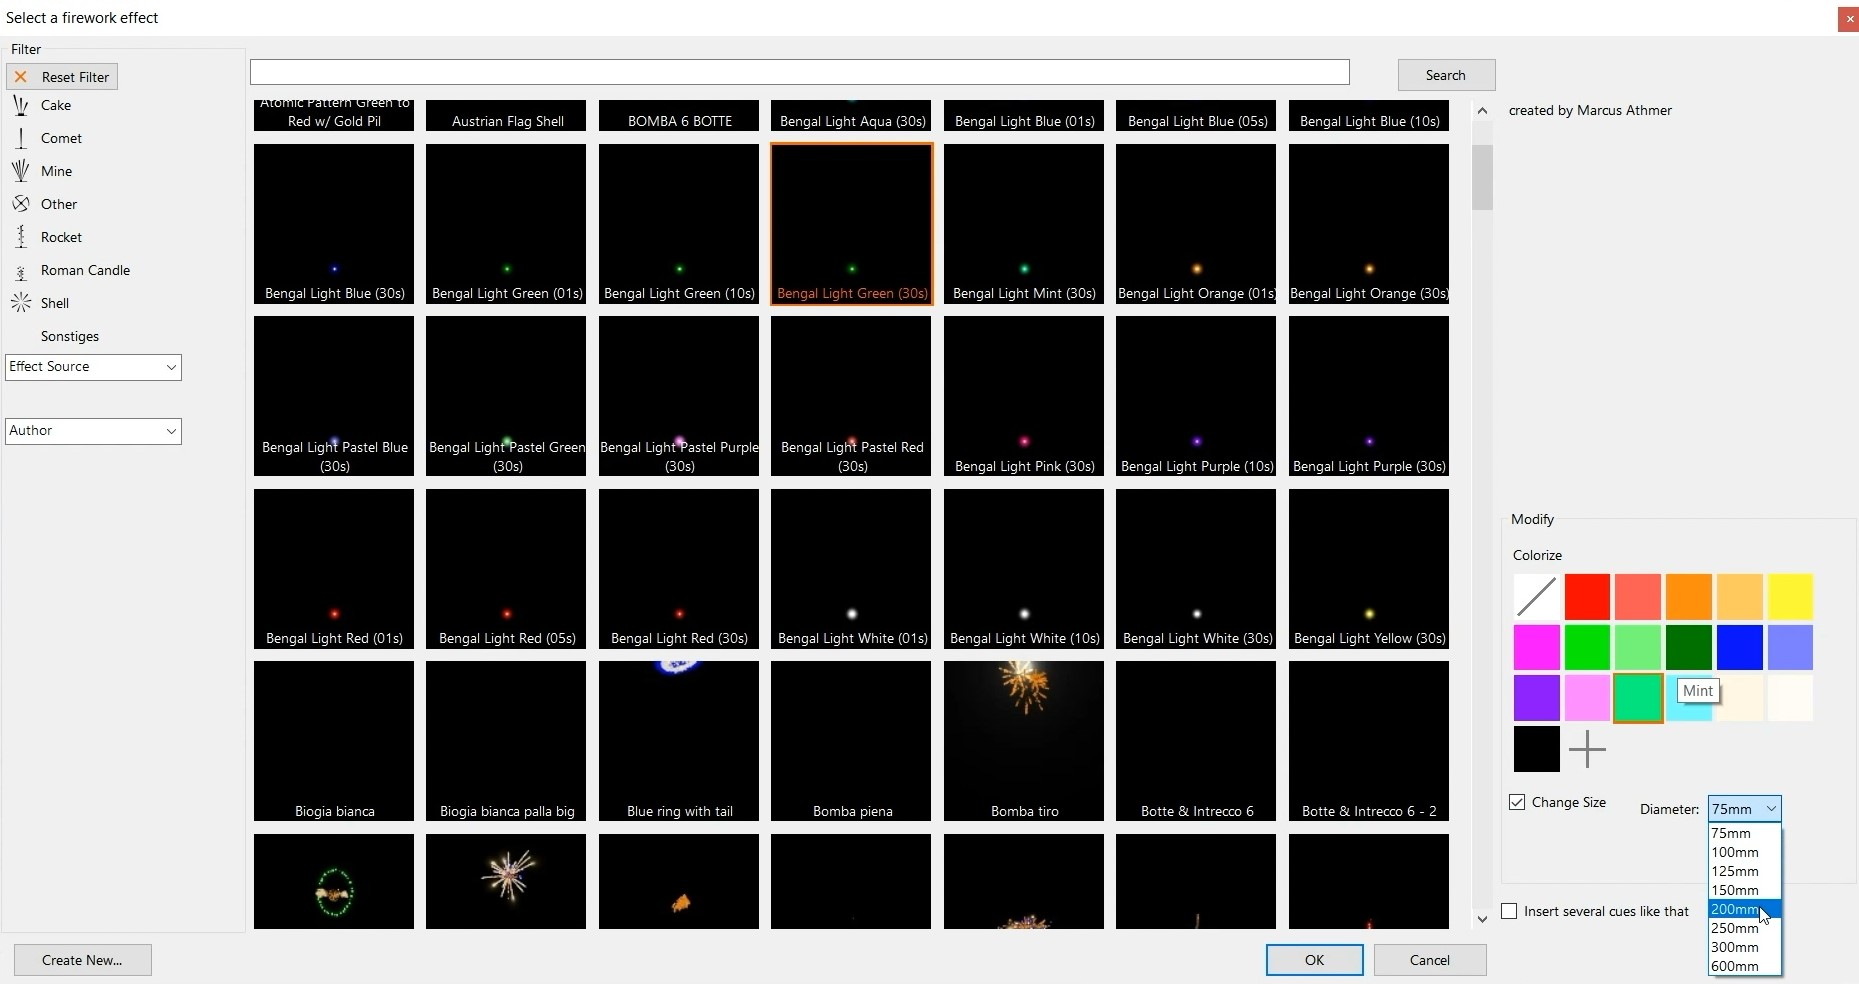
If you know exactly which effect or color you need in your show, you can search by keyword using the search function at the top. If you want to add several copies of the same effect into the timeline, make sure you have the option “Insert several like this” activated at the bottom right.
If you already have some firework effects in your show and everything is in the right place, you might want to change some fireworks without changing the timing. To do that, simply right click your cue and choose “Change Firework” or press F2 after selected you desired cue. The effect library window will open, and you can choose a different effect which replaces the effect currently used in your show.
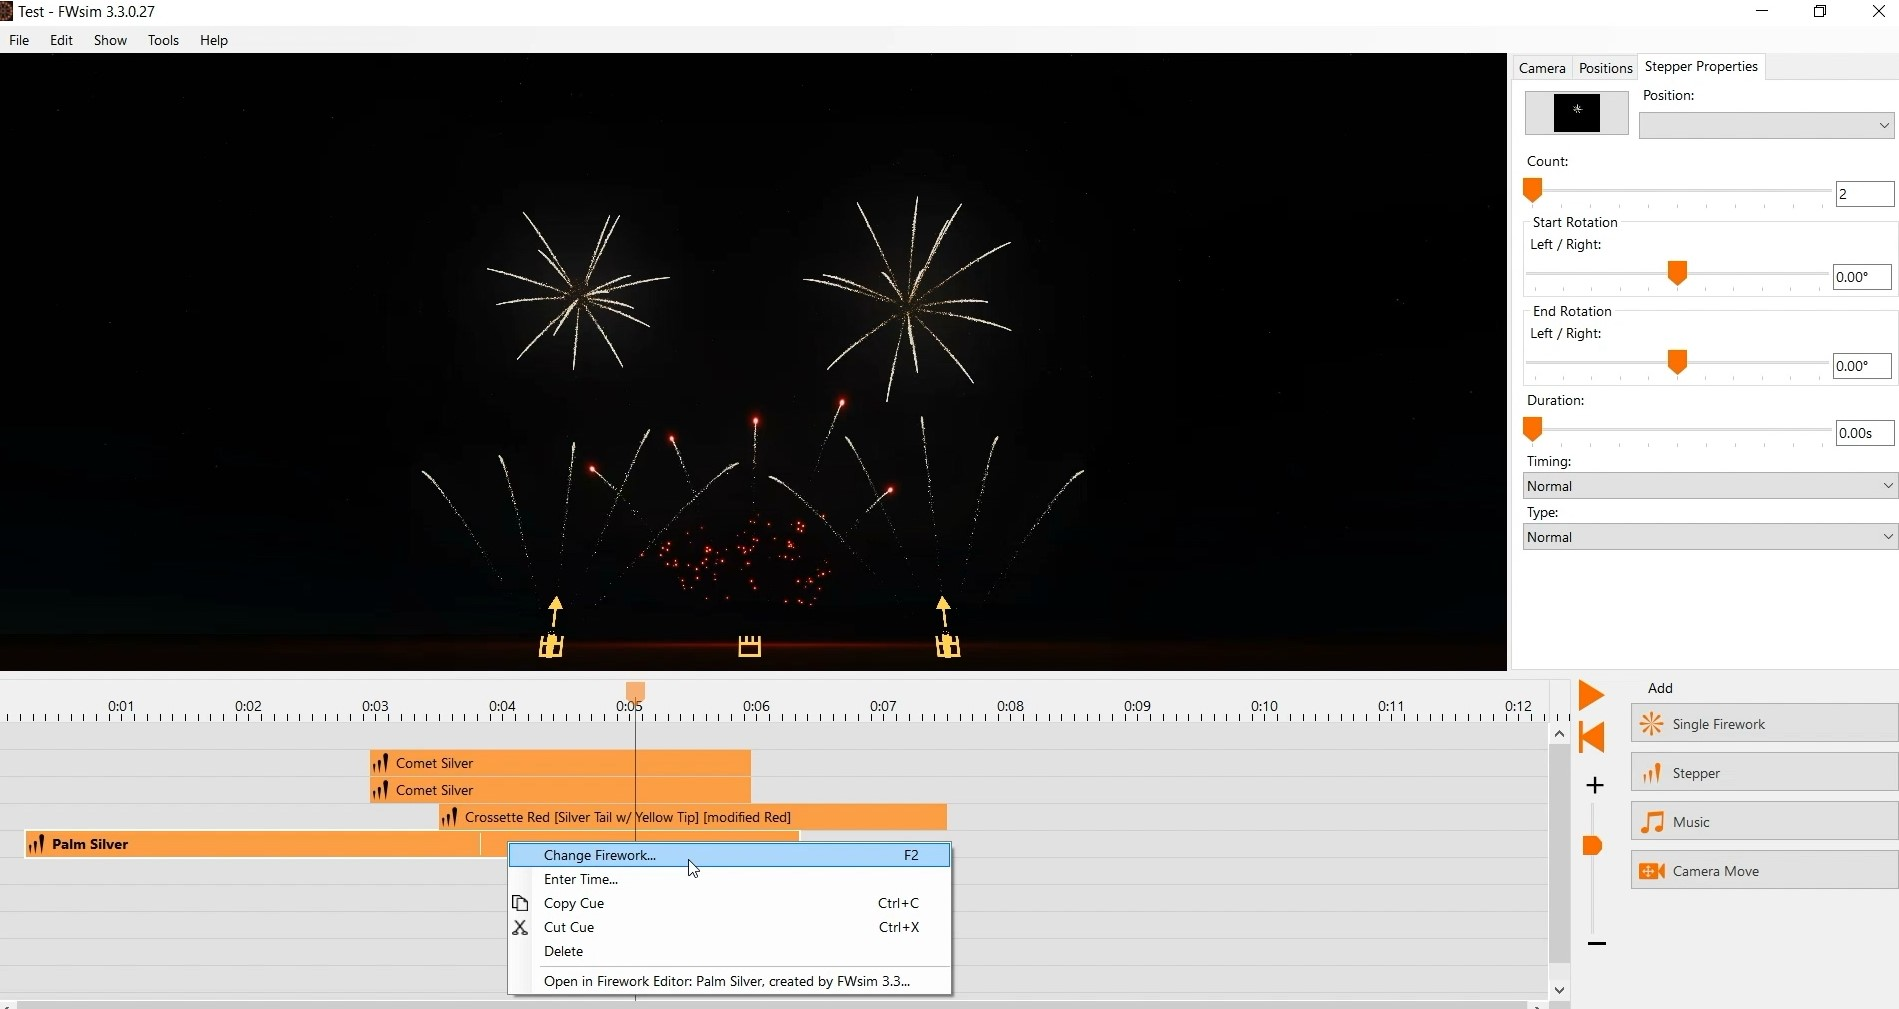
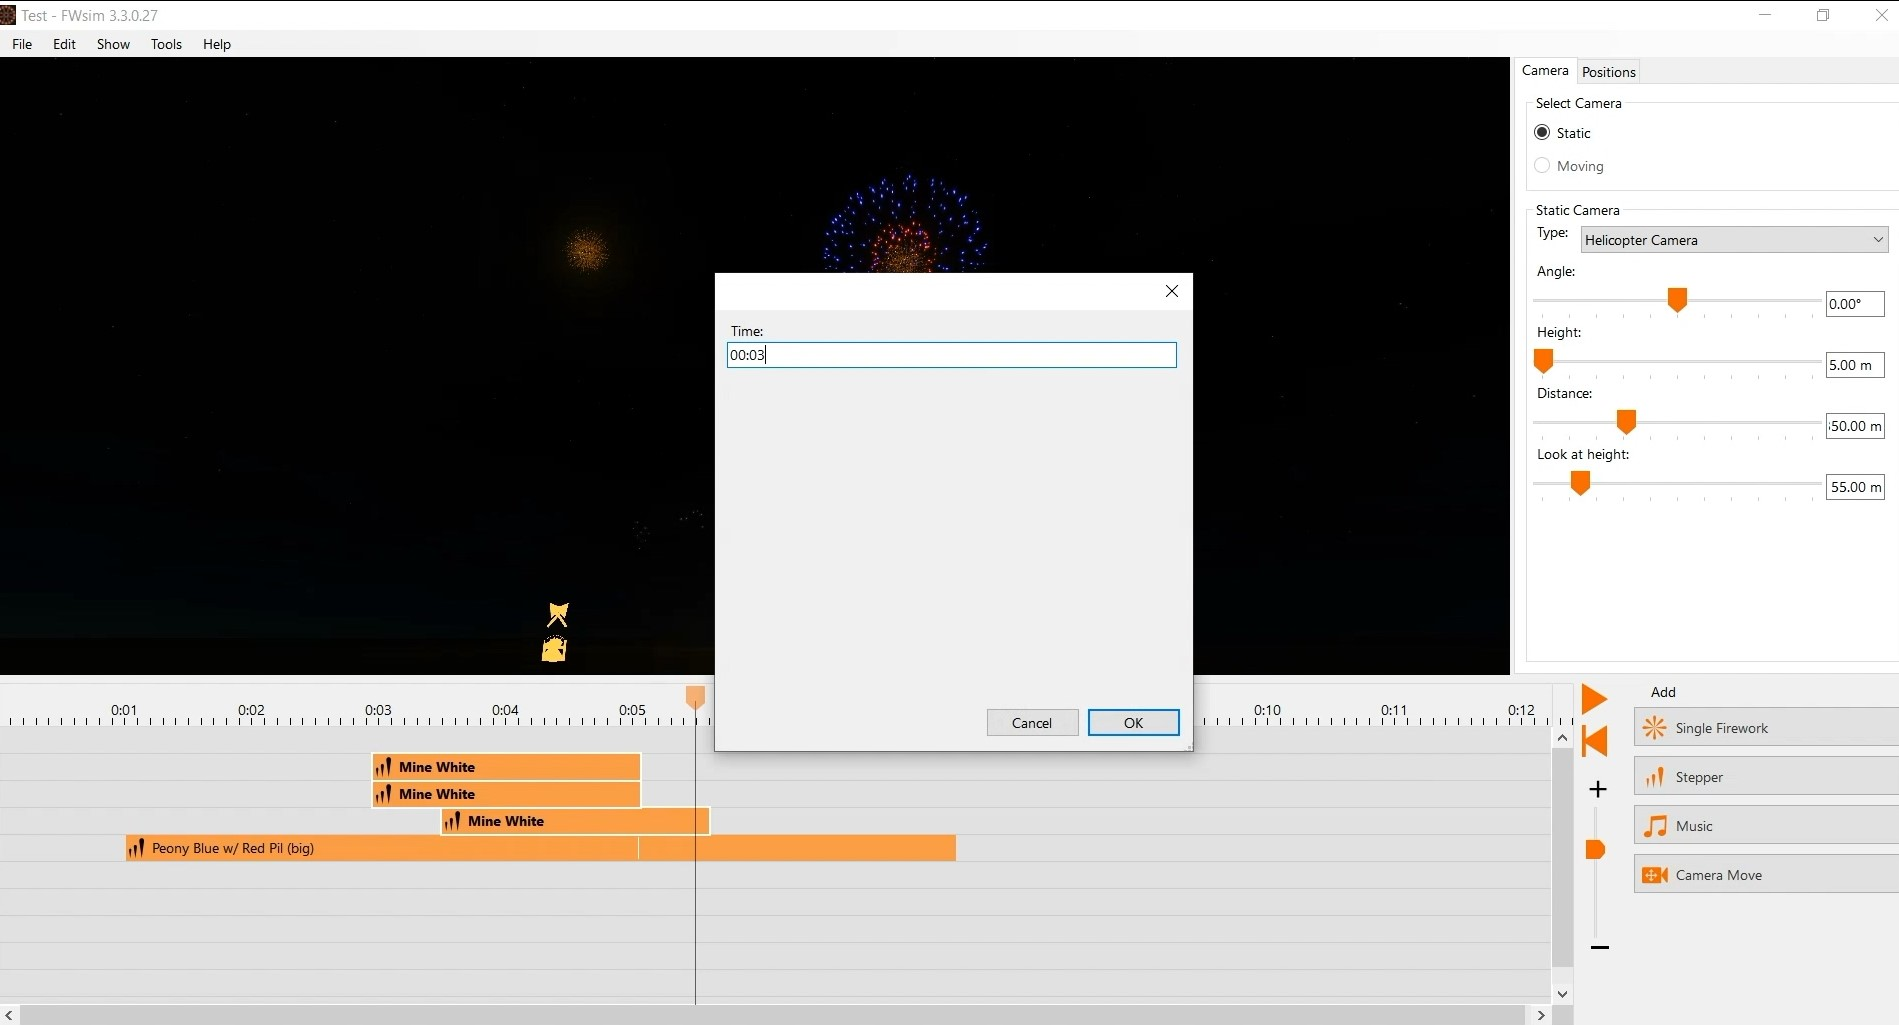
You can also select several shots in the timeline and then change the effect for all of them. If you need to fire an effect at a very precise time, you can right click and choose “Enter time”. If you have selected several effects, then all of them will be moved to the same time.
To reverse a stepper, simply press CTRL+R. To mirror a stepper, press F3. To insert a single firework, press F. To insert a stepper, press S. You don’t need to memorize these shortcuts: You can see them right next to each menu item.

If you are using FWsim Pro, you have access to a range of extra useful features:
You can undo any change by pressing CTRL+Z. After an UNDO, to re-do the change, press CTRL+Y. You can UNDO and REDO several changes in a row. This allows you to quickly try something new, and revert it immediately if you don’t like it. You can edit your show in table format. This is also called “script view”. You can find this in the “Tools” menu. FWsim Pro provides a wide range of other features. These include: Automatic Adressing, Chains of Cues, Multi-monitor support, Export to your firing system, Label Printing, Excel Export, Calculation of Price and Total Explosive Mass, Sharing Effects with Colleagues, and Inserting Shows into other shows. These will be explained in a future video.
We hope that these features and keyboard shortcuts will allow you to work more efficiently - and be more creative! If you want to suggest us a new feature, feel free to contact us.
In the last part we have learned about some useful shortcuts in FWsim. Now we will take a closer look at the timeline and show you some tricks how to work more efficiently.
First, I’ll add some music and some fireworks. Now, I would like to show you how to navigate really quickly in the timeline. On the right you can see a fader. We can use this to zoom in and out. Alternatively, we can press the CTRL key and use the mouse wheel. To add some more lines, we can simply click on a cue, hold the left mouse button and drag it down. New lines will be automatically added - as many as you need. To navigate in the timeline, you can use the horizontal and vertical scroll bars. But there are other ways: You can simply click and hold your mouse wheel inside the timeline area. You can also use the arrow keys on your keyboard to scroll one second forwards or backwards. If you want to jump to the beginning or to the end of your show directly, you can press the “Home” or “End” keys.
To add a music file, simply select the file in Windows Explorer and drop it onto the timeline. When you add music, that music is usually displayed both inside the timeline and on top of it. If you want to move it around, drag it in the timeline. When you have found the right position for your music, we suggest you hide it from the timeline. That way, you get more space and you avoid accidentally moving it. You can do that by right-clicking on any free space in the timeline and disabling “Show Music in Timeline”.

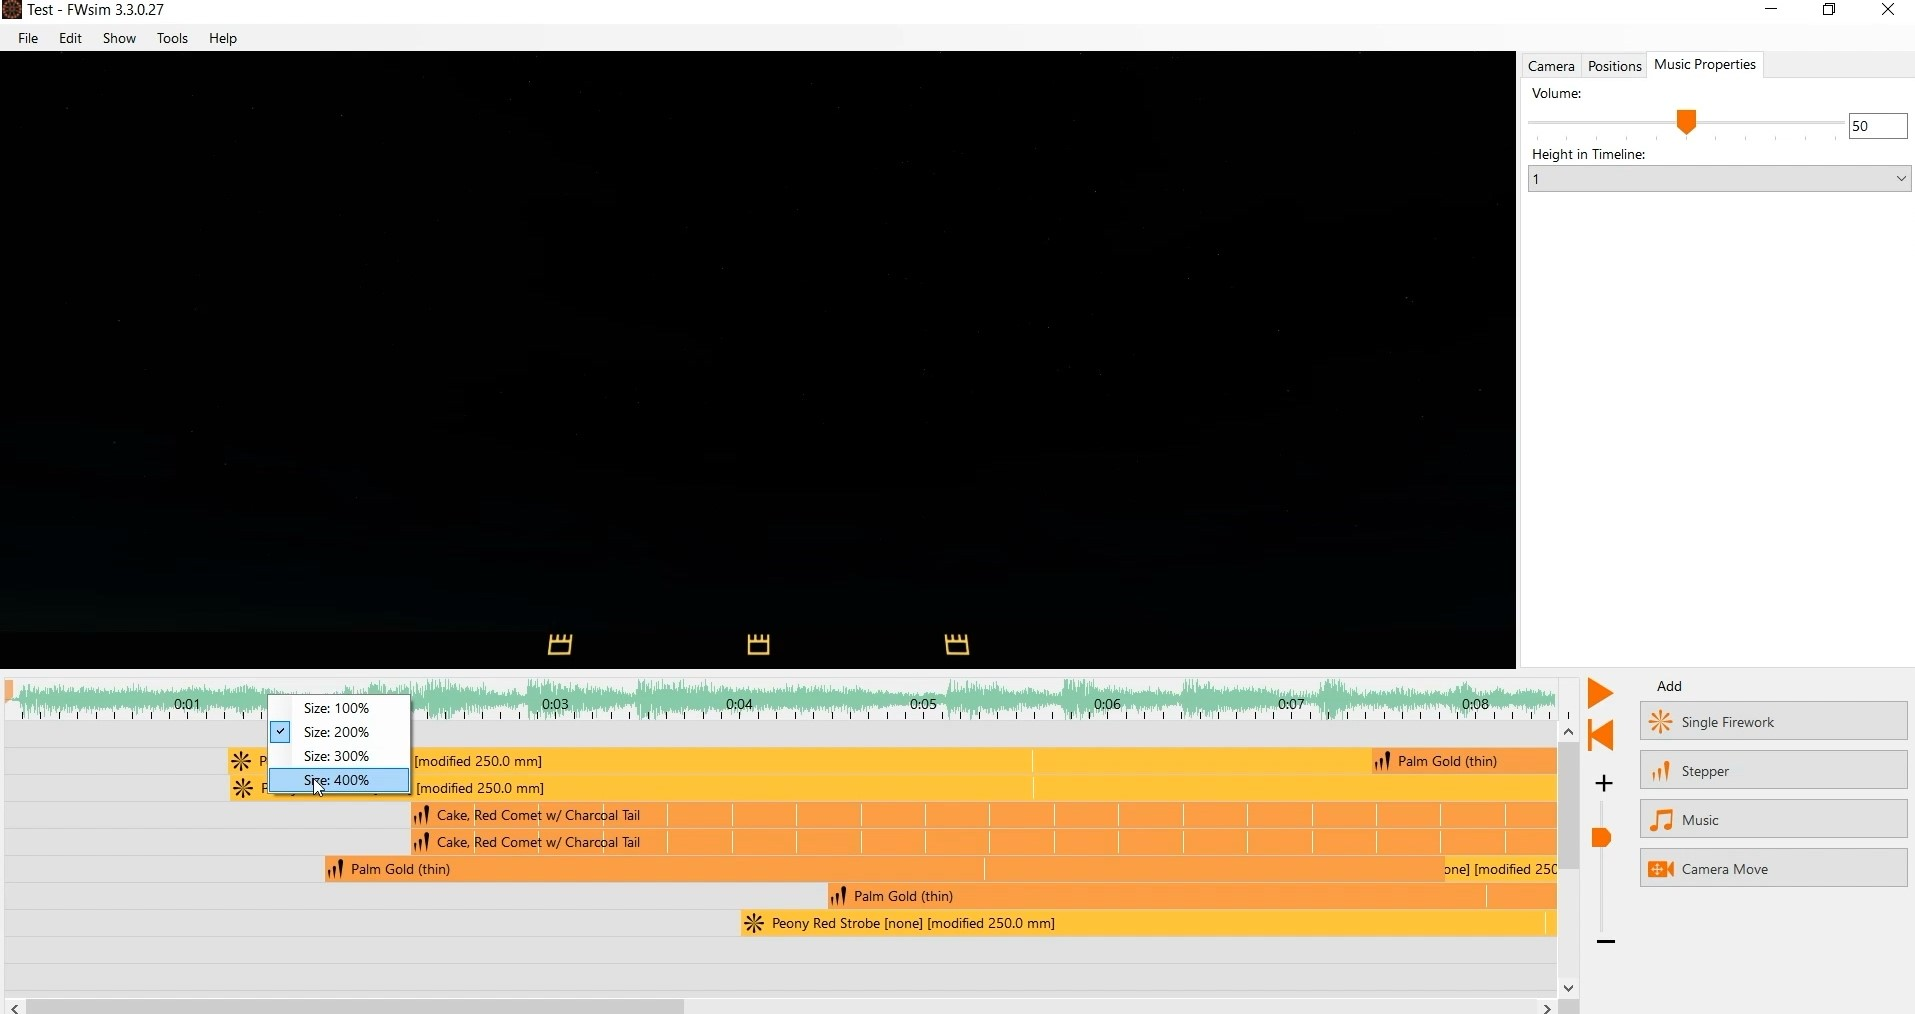
In order to position your fireworks more accurately, you might want to see the music waveform in more detail. You can right-click on the top area of the timeline and select “200%” to make it larger.
If you want to change how many lines you can see at once, simply go to “Tools” and click on “Preferences”. Here you can adjust the size of your lines with the fader “Vertical Zoom in Show Editor”. You can also make the entire timeline area bigger or smaller.
To select multiple cues, you have two options: You can drag a rectangle with your mouse or keep the SHIFT key pressed. You can also keep the SHIFT key pressed and drag multiple rectangles. We hope you find these tips and shortcuts useful. If you have any question, feel free to contact us.
This time, you’ll learn to manage the environment settings in FWsim, how to use background images and how to work with 3D Models.
First, we look at the general settings that affect how all shows are displayed. We klick on “Tools” and then on “Preferences”. Here we can choose our graphics quality, if we want to have some natural background sounds, for example like wind, and also if the simulation should be realistic or accurate. “Realistic Simulation” means that there will be added random variations to timings and heights. This is more realistic. But it means that your firework effects will not explode exactly when you want them to. “Accurate Simulation” disables these variations, to make timings and heights perfect.

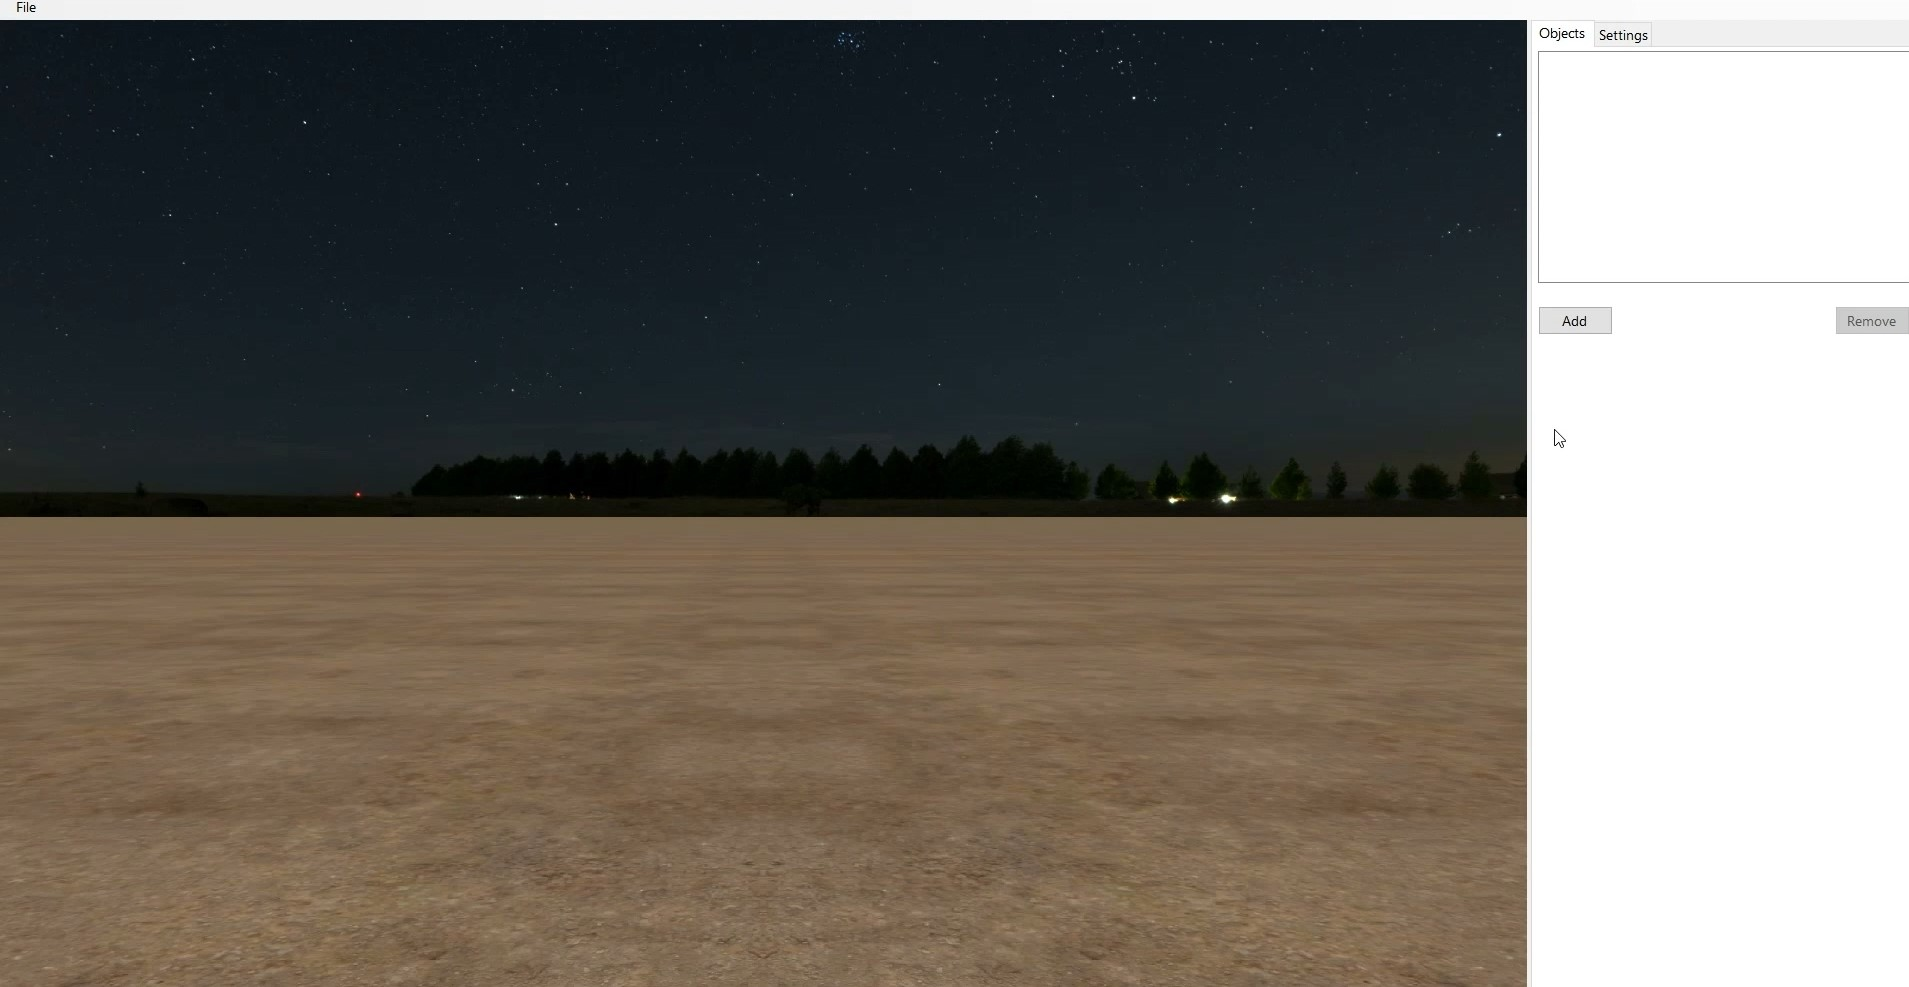
Every show has its own environment settings, with background images and 3D models. You can change them for each show individually. We click on “Show” and then select “Scenery”. Here, we can choose a 360° background. FWsim comes with three backgrounds, which look like this: These backgrounds are 360°. When we rotate the camera (by clicking and holding the mouse wheel), we can look into any direction. You can also load your own 2D background image. However, this will not look correct when you move the camera. If you use a 2D background image, you should decide on one camera position that looks correct. (By the way: We will explain camera control in one of the next videos)
Furthermore, we can choose a 3D-World. You can select a 3D world included in FWsim or one you created yourself. In the next section of this video, you will learn how to create your own 3D world. Use the “background brightness” slider to make your background darker or lighter. Usually it’s good to make it somewhat dark, to get a good and realistic contrast to the bright fireworks. Use the “3D World Brightness” slider to adjust the brightness of the ground and the 3D environment. You can enable or disable the ground by clicking “Show Ground”.
Since 2023, FWsim is able to load not only custom 3D worlds, but also any real location in 3D - with the Google Earth integration.

To create your new 3D-World, click “Tools” and “3D-World-Editor”. We start with an empty world.
To add 3D models, we click on “add”. In this window we can select one of the 3D models included with FWsim, or import our own. FWsim supports a variety of 3D model formats, however it is important that your 3D model is not too big. Click the [link] (https://www.fwsim.com/find_free_3d_models.html) to learn more about which 3D models work and where to find good 3D models. If you find a 3D model on the internet that does not work with FWsim, [please let us know] (https://www.fwsim.com/contact.html).
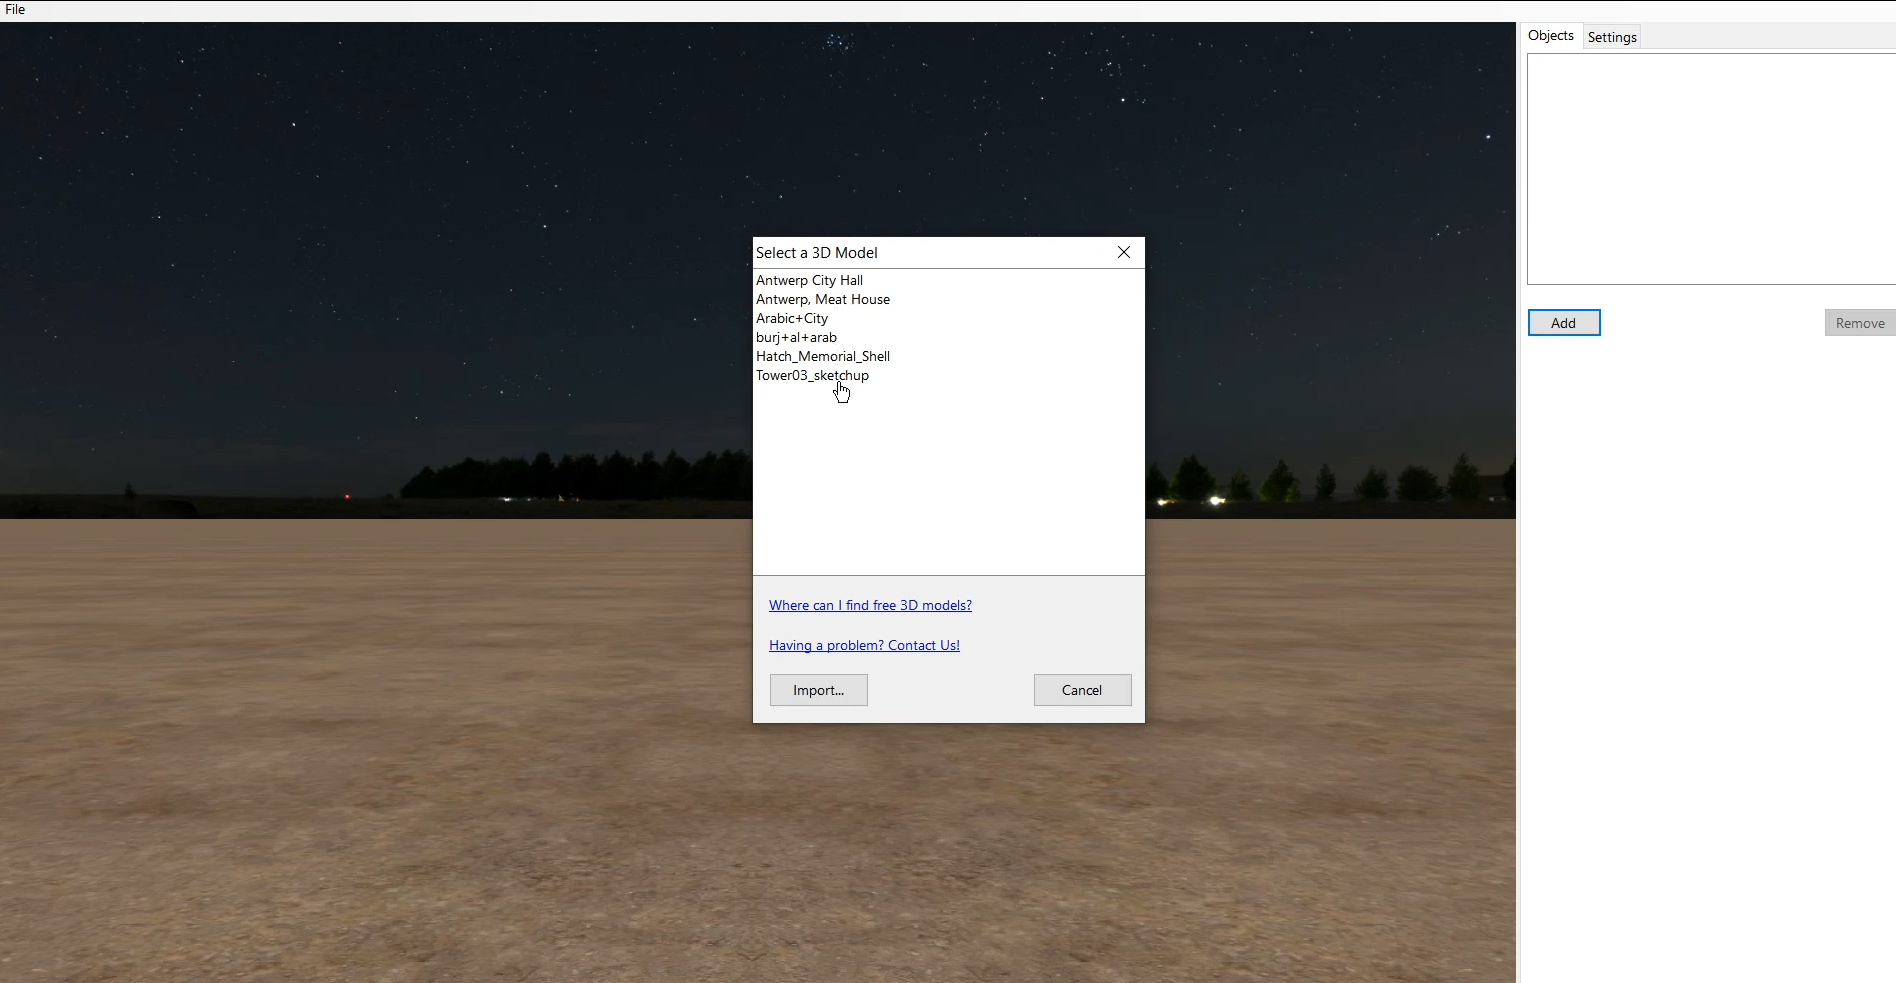
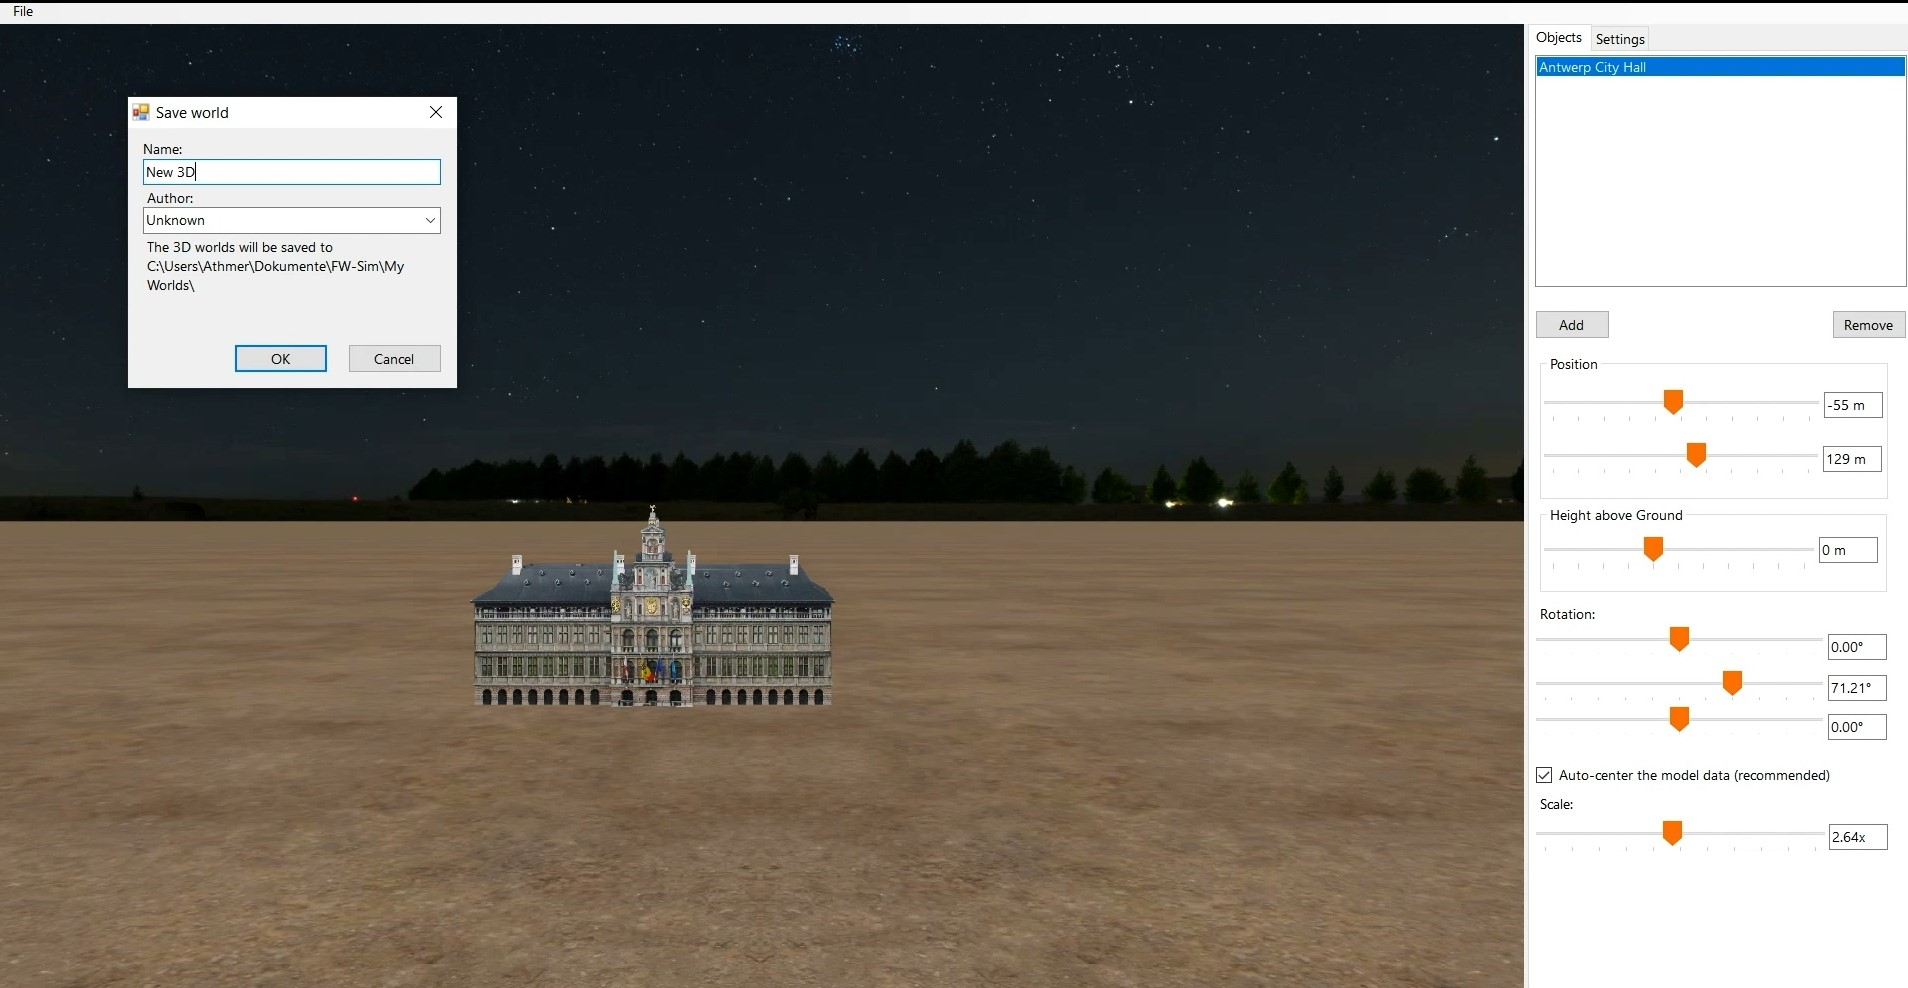
Click on a model to add it to the show. Now you have plenty of options to create spectacular scenery. You can change the position of the 3D-Model, rotate it or simply scale it. You can also add as many 3D-Models as you want. Everything is in the right place and you’re ready to use your new scenery? Navigate to File and click on “Save 3D World” or simply use Ctrl + S. After you’ve closed the 3D-World Editor, you can choose your new Scenery under “Show”, “Scenery” and “3D World”.
Since 2023, it is also possible to load any location on the Earth by using Google and geographical coordinates.
Here’s how to do it:
Now it’s your turn. Just be Creative and create spectacular 3D-Worlds which you use as scenery for your fireworks!
In this tutorial you’ll learn how to synchronize your fireworks with music. This is also our first tutorial video recorded with FWsim version 3.4 This update brings a new dark design, as you can see - but most of the buttons are still in the same places.
You can simply drag and drop your music from Windows Explorer into the timeline. The music will show up in the timeline, but also on top of the timeline. Inside the timeline, you can move your music to make it start earlier or later. On top of the timeline, the music is displayed but it cannot be moved. When you click the music, you can change the volume on the right hand side. If the music is at the right place and you don’t need to move it, we recommend you hide it from the timeline. To do that, right-click on an empty portion of the timeline and disable “Show Music in Timeline”. You might want to make the top area of the timeline bigger, so you can better see the waveform. Simply right-click the waveform and choose a different size.
The easiest way to synchronize your fireworks to music is to take a close look at the soundwave and search for peaks. When I want to design a show quickly, I use this method. After placing the cues approximately, I repeatedly listen to a certain part and adjust my fireworks until they match the music nearly perfectly. If I have to design a show rapidly, I repeat listen to the part and adjusting my added fireworks to the point they match nearly perfect to the music. Here is a trick to make it easier to repeatedly view the same section: Click the Gear Wheel next to the Timeline, and disable Play/Pause Mode. Now the cursor will jump back to its starting position when you stop playback.
When you want your timings to be really perfect, you should use some of the advanced tools for synchronization. Right-click your music in the timeline and select “Synchronize with music.” A bigger and more detailed waveform will appear. Here, we can set up certain beats that will then be displayed in our timeline. To scroll around, use the scrollbar at the bottom or press and hold the middle mouse button. If you want to add individual beats, click “Mark Single” or press the S key. You can add beats while paused or even while playing. To move beats around, use the left mouse button.

If your music has a regular tempo, then you can quickly create beats throughout the song. First, you need to listen to a segment and count how many beats there are. In most songs, a measure of music will have 4 beats. Place the cursor at the beginning of the phrase and press “Phrase”. Next, place the cursor at the ending of the phrase and press “Phrase End”. By default, 16 markers are inserted at equal intervals. To change this, we hover over the beginning or end point of the phrase, right-click and select “edit”. Now you can insert our count of YY beats.
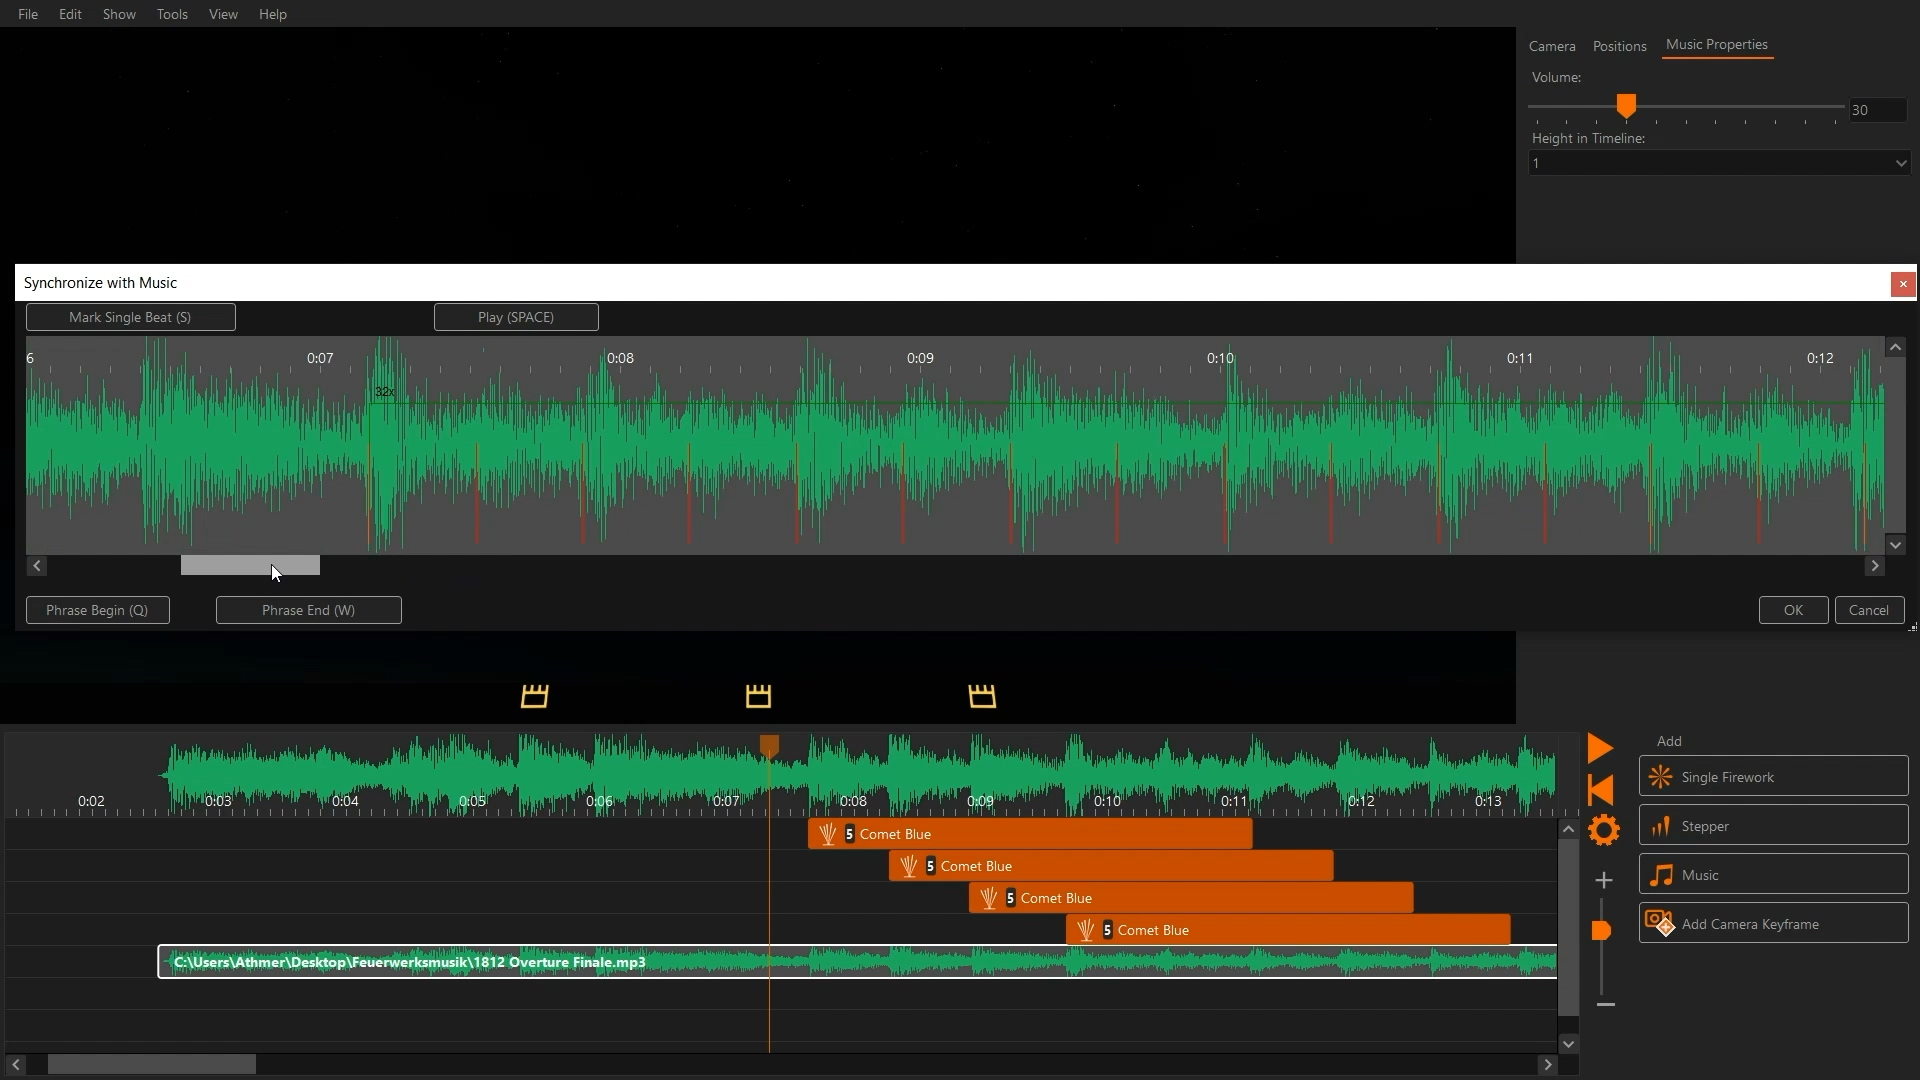
You can right-click on a phrase or single marker to delete them. Repeat these steps to set markers at significant points in the song. When you are happy with your result, click OK. The markers are now shown on top of the timeline. If you move cues, they will automatically snap to these times. To disable snapping temporarily, hold the SHIFT key.
FWsim Pro only: In FWsim Pro v3.4, there are several new tools that are useful for music synchronization. You can activate them by clicking the Gear Icon. “Insert and snap at Burst Time” will use the burst time of shells as the reference for snapping. “Vertical reference line while dragging a cue” makes it easier to get precise timing.
That’s it! Now it’s your turn to create perfectly synchronized shows with FWsim.